
This pyrography project will be more decorative in nature mainly relying on line work, with only a moderate amount of shading and also the addition of colour. I will be using the pyrography picture produced in this tutorial to cut a hand-crafted jigsaw puzzle after the art work is completed. A number of people will be following along using the same pattern so it will be a fairly detailed step by step process. The pattern used is in fact the same pattern I designed for the relief carving earlier.
This pattern will be available soon on my website in the pyrography section and will be available to anyone who wants to download the PDF file to use as a free pattern and follow along with the tutorial. The design itself is of course copyright and cannot be published or sold. You can use the pattern for your personal work and you may sell any craft works you personally make as an individual, not in the course of employment, provided you acknowledge the source.
Pyrography Tutorial 'Young Dragon Hiding'
I will be posting and adding to this step by step tutorial as regularly as I can find the time to do so and I will begin with the process of transferring the image from the pattern to your timber.
First obtain a relatively light coloured piece of timber at least 340mm X 190mm to accommodate the pattern. Sand the surface of the board thoroughly with 400 grit paper until it has acquired a soft sheen. 400 grit should suffice in this project as we will not be using a great deal of subtle shading. I often sand the surface to 600 or 800 grit. always sand with the grain of course.
Print your downloaded patterns on some 'bank layout paper', this is paper that is not as transparent as tracing paper but is still fairly thin and translucent. You could make do with anything close to these characteristics that will go through your printer.
Use cut down A3 size paper, because the image is just over 4cm longer than A4. If you only have an A4 printer like me then it might have a 'double A4 panorama' setting that will allow the entire image to be printed on cut down A3 paper equal to A3( 420mm ) long but 210mm wide. Otherwise You'll have to print two A4s registered and taped together.
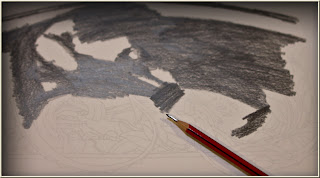
With the grey line pattern printed on suitable paper, firmly apply a good coating of graphite from a 4B to 6B pencil on the back of the print directly over the lines. You can see the lines through the back of the paper because the paper is translucent enough to allow it. Otherwise you'll have to cover the whole back of the paper with graphite. Get a good coating on, because you don't want to have to repeat the process if you can help it. When you turn the print over you will still see the grey lines because the paper is opaque enough. Had you used regular tracing paper it would be too transparent and you would not see the lines you need to trace
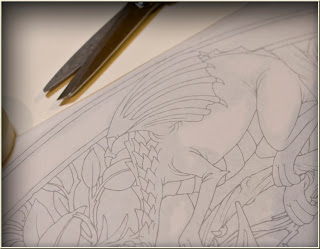
The next step is to hinge the paper to the top edge of your board and then you can trace carefully over the grey lines with a blue biro ( it will show up where you have been and if you want to trace off another you can, using a darker biro, given there is sufficient graphite on the paper ). The reason for the grey lines should now be apparent and also the use of bank layout paper, which being thin, helps you to press through with an easy amount of firmness and get a good impression on the board without denting it too much. Do not trace the whole thing just yet, just one short line or two. Then you can lift the paper to see if you are getting a good transfer.
When you are satisfied that it is going to work, after checking, smooth the paper down flat again and tape it taught at the bottom with just a couple of short pieces keeping every thing firmly in place. You can now trace the line work onto your board with confidence if you use the same pressure you tested.
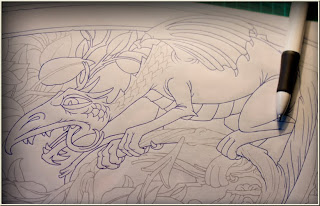
Trace over the entire image using short easy to control strokes. Take it slowly and carefully, a clean careful transfer will pay great dividends when it comes to rendering your work with the pyrography tool later. In fact try not to think of this process as tracing at all but drawing instead, a drawing that you will be doing two to three times over for just one result. Lose concentration, or skimp on effort, in just one of the processes and it will affect the rest of your work adversely.
During the 'tracing' process use all the tricks you know for drawing in general and treat it as a drawing exercise. For instance turn the board around from time to time to be able to follow the lines comfortably. Keep the ball of your hand on the inside of any curves you are drawing, so as to use the natural arc of your drawing hand and not awkwardly fighting against it. Rest you hand if necessary, you're not working to a deadline.
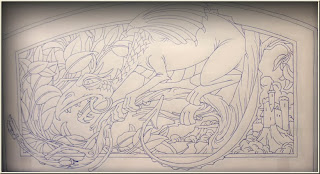
Try to get an understanding of the drawing as you go, notice how the lines relate to one another the way they join one another, at what angle they join, see when one longish line here or there is really a confluence of other joining lines and draw each of the separate lines that join to make it, rather than following the more economic conclusion of simply drawing what you think it pretty much seems to end up as. Analyse all the aspects of the line work as you go and treat the whole process as a drawing lesson. If nothing else it will keep this part of the job from being a mindless and boring process. Besides, pyrography is pretty much nothing more than drawing anyway, drawing on a particular kind of surface – wood in this case, with a particular kind of tool, pyrography pen, in this case.
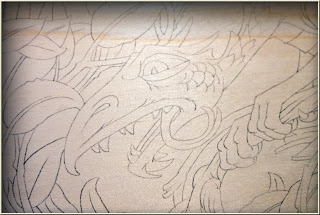
When you've finished and all the grey lines are now blue biro, remove the paper. A distinct transfer of the original should now be on your board. The lines on the board will consist of a good many loose graphite particles that will soon make your nice smooth, light coloured timber board, into a quite 'grubby' smooth board, not as light coloured as it was formerly. The remedy is a piece of kneaded eraser, or 'Blu Tac' will do. Form the piece of 'Blu Tac' into a point, dab it all over the lines, picking up the loose graphite powder from the surface of your board. You will now have a very light but useable image to work from. If there are any places that have been lost or are too light to read, then you can touch them up carefully with an HB pencil and generally tidy up the transferred image.
That's the second time you've worked on this drawing and the actual pyrography will be the third if you don't count some of the extra details you will be drawing in later.
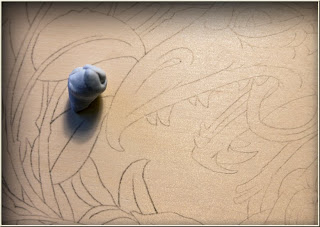
All the extra work that is put in at these preparation stages is going to make the final result so much easier to achieve and also far better in quality at the end. So next thing we will prepare the pyrography tools for action and commence building up the image on our board.

No comments:
Post a Comment